Showing posts with label Scrapbooking. Show all posts

Monday, July 22, 2013

Alice in Wonderland Crop: Madhatter Tea Party

This past weekend was a whirlwind for me. I ran the Lunar Rendezvous 5K Saturday morning and then rushed home to host a 14 hour crop with some amazing women in my home.  The theme?  Alice in Wonderland.  I liked the movie as a kid but fell in love with it in 2010 when it came out again.  I really enjoyed putting this on together.  Right now I am just sharing the pictures.  I'll put together the how to's and supply list later this week.

No Madhatter Tea Pary would be complete without top hats.  I made these top hats using my Silhouette and a cut file from the Silhouette store for a 3D leprechaun hat.  You may recognize the stand as party of my centerpiece from the Breakfast at Tiffany's party. I looked for ways to display the hats in a box or something but the headbands and the bulkiness of the top hats made them fall over.  I finally gave up and just put them on the branches...an accidental good idea.  The frame has a quote from the movie. It is the exchange between the Madhatter and Alice. He asks if he has gone mad and she says yes but all the great ones are.


I love decorating for parties but I try to keep to a tight budget.  I try to buy things on clearance or on sale.  Dollar tree is one of my favorite stores. You have no idea how much you can get from the dollar store if you learn to think outside the box.  I also use my 50% off coupons at Hobby Lobby and Michaels and I always start out in the clearance section.  That is where I found these mugs. They are tea cups per se but we don't drink tea in our house so I bought coffee mugs.  I wanted a colorful party so I bought them in colors I knew I could use in my home everyday.

They were a dollar each at my Hobby Lobby in the clearance section.  the saucers (I wish I took a better picture of those) are from Tuesday Morning. Again they were in the clearance section (4 of them for $3.00). The feathers were $1.49 each at HL on sale.  All the flowers came from the Dollar Store.  The cut outs inside the top cup were from Cloud 9 Designs. Hurry she has them on sale for $1.99 for the whole package, She had a 3D hat, teapot, teacup, clock invitation...just go see.  I have about 7 frames that I bought from Ikea for about 1.99 each.  I keep them around and change out the displays. For this party I used digital paper from Rhonna Farer Urban Junque kit from Twopeasinabucket. I can't find it there anymore but it is beautiful colorful paper.  In MyDigitalStudio I created quote pages using Urban Junque.  Here is a close up of one.  

Frames with quotes are a great inexpensive way to decorate a party.  

I also saw on Pinterest that someone stacked three mini top hats that reminded me of the lopsided cakes...so of course I had to make them. Behind them you will see the vase my husband gave me for mother's day and it has dollar store flowers inside it. 

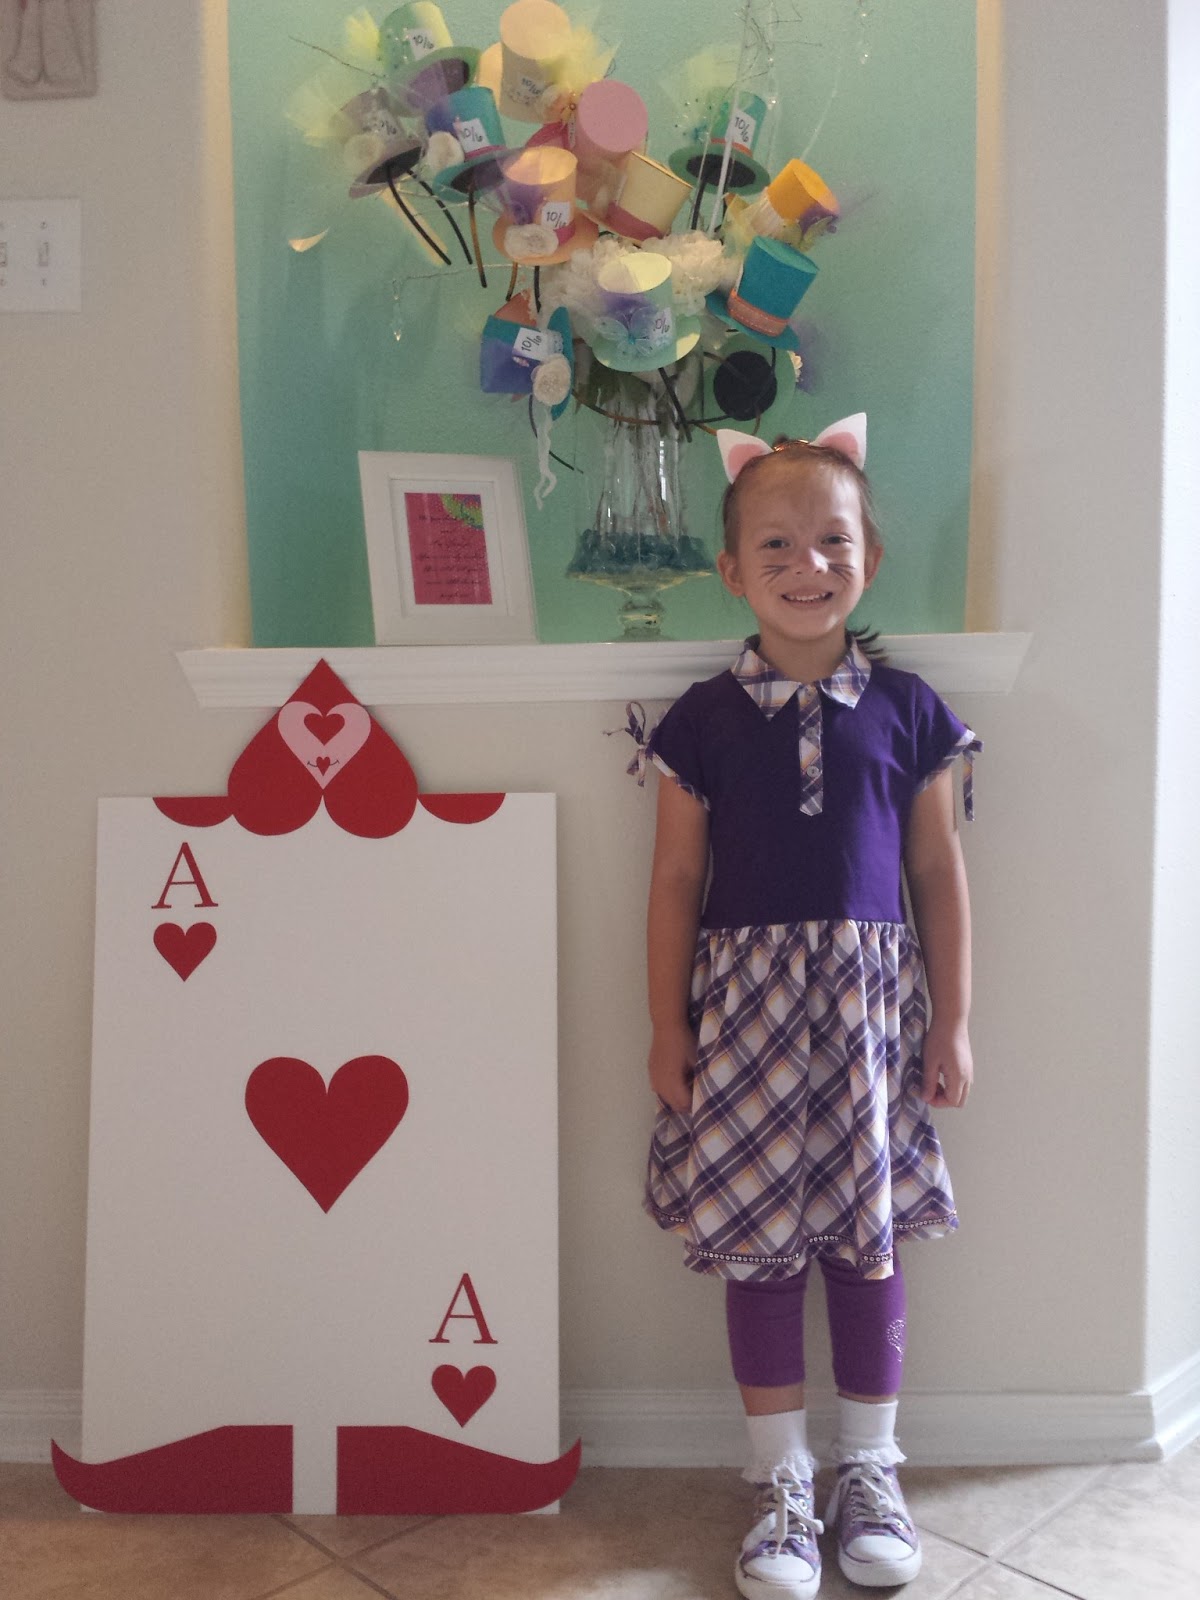
Surrounding the parameter I had the evil Queen of Heart's soldiers.


I made these guys from foam board that I found at the dollar store and cardstock.  I just love them.  Again, I used my Silhouette and cut out the hearts, letters and feet.

I forgot to mention Goodwill...another great place for finds. I found these little white cups there.  All 5 were $1.60 in total.  As soon as I saw them, I knew I wanted to stamp faces on them. I have a set of faces from PeachyKeen.  I love their stamps.  They turned boring white cups into cups with character.  

And finally, while at Tuesday Morning I came across this teapot and I couldn't resist.

You guessed it.  Alice in Wonderland Teapot and Sugar bowl.  Now I don't usually buy anything over $5.00 for a party, unless I plan on using it again but I just couldn't resist. It was perfect.  As luck would have it, one of the gals at the party was going to throw a tea party for her daughter and she bought it from me at the end of the night.  I also gave her all my Alice in Wonderland specific decorations to use at her party.  I am glad they are going to a good place to be used and appreciated.  As opposed to my bonus room that has become the storage place of parties of the past.  I kept the sugar bowl as a souvenir.  And I sent each person home with their own mini top hat.


Pin It

Tuesday, March 5, 2013

How to make Candy Jar for Candy Bar


I finally did it!  I hosted my first event in my home!  It only took 7 years but I finally did it!  Sure I have hosted family gatherings,  like Thanksgiving, and two church gatherings. But those I did when I first moved into my home.  I use to say it was because I didn't know any better.  My house wasn't decorated enough, painted enough, pretty enough etc.  But you know what?  It is never going to meet my standards and I had to come to terms with that reality...or my perception of reality. I read a blog post once about not waiting for your house to be ready for guests because it will never be ready.  That the most important part of hosting people for a gathering or for the weekend is to make them feel comfortable and at home. It was a great article.   If I find it again, I will update this one with the link.  I read it years ago, but it planted a small seed.  A seed so small that it took years for it to break through the ground and finally bear fruits.

I decided to use Pinterest for ideas and I fell in love with Candy Bars. Not like a Hershey's candy bar but a bar much like an alcohol bar but filled with candy instead of spirits.  But I knew I didn't want to break the bank so I had to improvise.In this video, I will show you how I took two vases from the dollar store and made my own candy jars for a Candy Bar.  I originally saw a similar idea on Pinterest, using mason jars. Those can be seen at http://eighteen25.blogspot.com/2011/04/pickle-jar-project.html.  However, I didn't have any mason jars so I bought a few candle holders for the tops.  These candy jars are so easy to make and inexpensive.


Supplies needed:
- candle stick holder (dollar store)
-  wider candle holder jar or bowl (dollar store)
- strong liquid adhesive ( I used E6000 which can be found at  most hobby stores)
- candy (optional)
-  candy scoop (optional)
-  any items you want to use to decorate jar (optional)

Make sure both the top and bottom candle holders are clean and dry.  Put glue on both holders where they will connect. Since the glass in not porous, wait 2 minutes and then put the two items together.  Make sure the top is center.  Allow to dry for 48 to 72 hours before using.

If you like this video or found it helpful, please click the  "Like" button.  If you would like to receive notices when I have uploaded more videos, please click the "subscribe" button.


Pin It

Friday, January 4, 2013

Where has the year gone?

Can you believe we are already at the first weekend of 2013?  Where did the first few days of 2013 go?  No, seriously, where did it go?  It feels like just yesterday I was thinking, "Man, what am I going to do with 4 1/2 days off of work?"  I started to make a list of projects that I was going to complete, the first one being....take the tree down.  Well it's already the 4th, the holiday is over and the tree is still up and no projects we completed.

To make myself feel better, I am going to say I believe the decor should stay up until Three Kings Day (which is the 6th).  Whew!  Well that gives me until Sunday evening to take down the tree. Besides, my house seems so bare when I take down the decor. Let's face it, I feel confident in temporary decorating that lasts six weeks but when it comes to making decor decisions that should last for years....I'm paralyzed. So that is part of my resolution....no paralysis by analysis.
 
Meanwhile, while I work on that, here a video on embossing. I love embossing on pages and cards.  It allows you to add texture to a page or card, without adding bulk.  I hope you enjoy.  Comments are always welcome and subscribe to my channel by clicking the subscribe button.


Pin It